→ 12V System
The 12V system is protected by a 60A breaker feeding the Blue Sea 12V 12-circuit fuse holder on the passenger side wall of the electrical system.
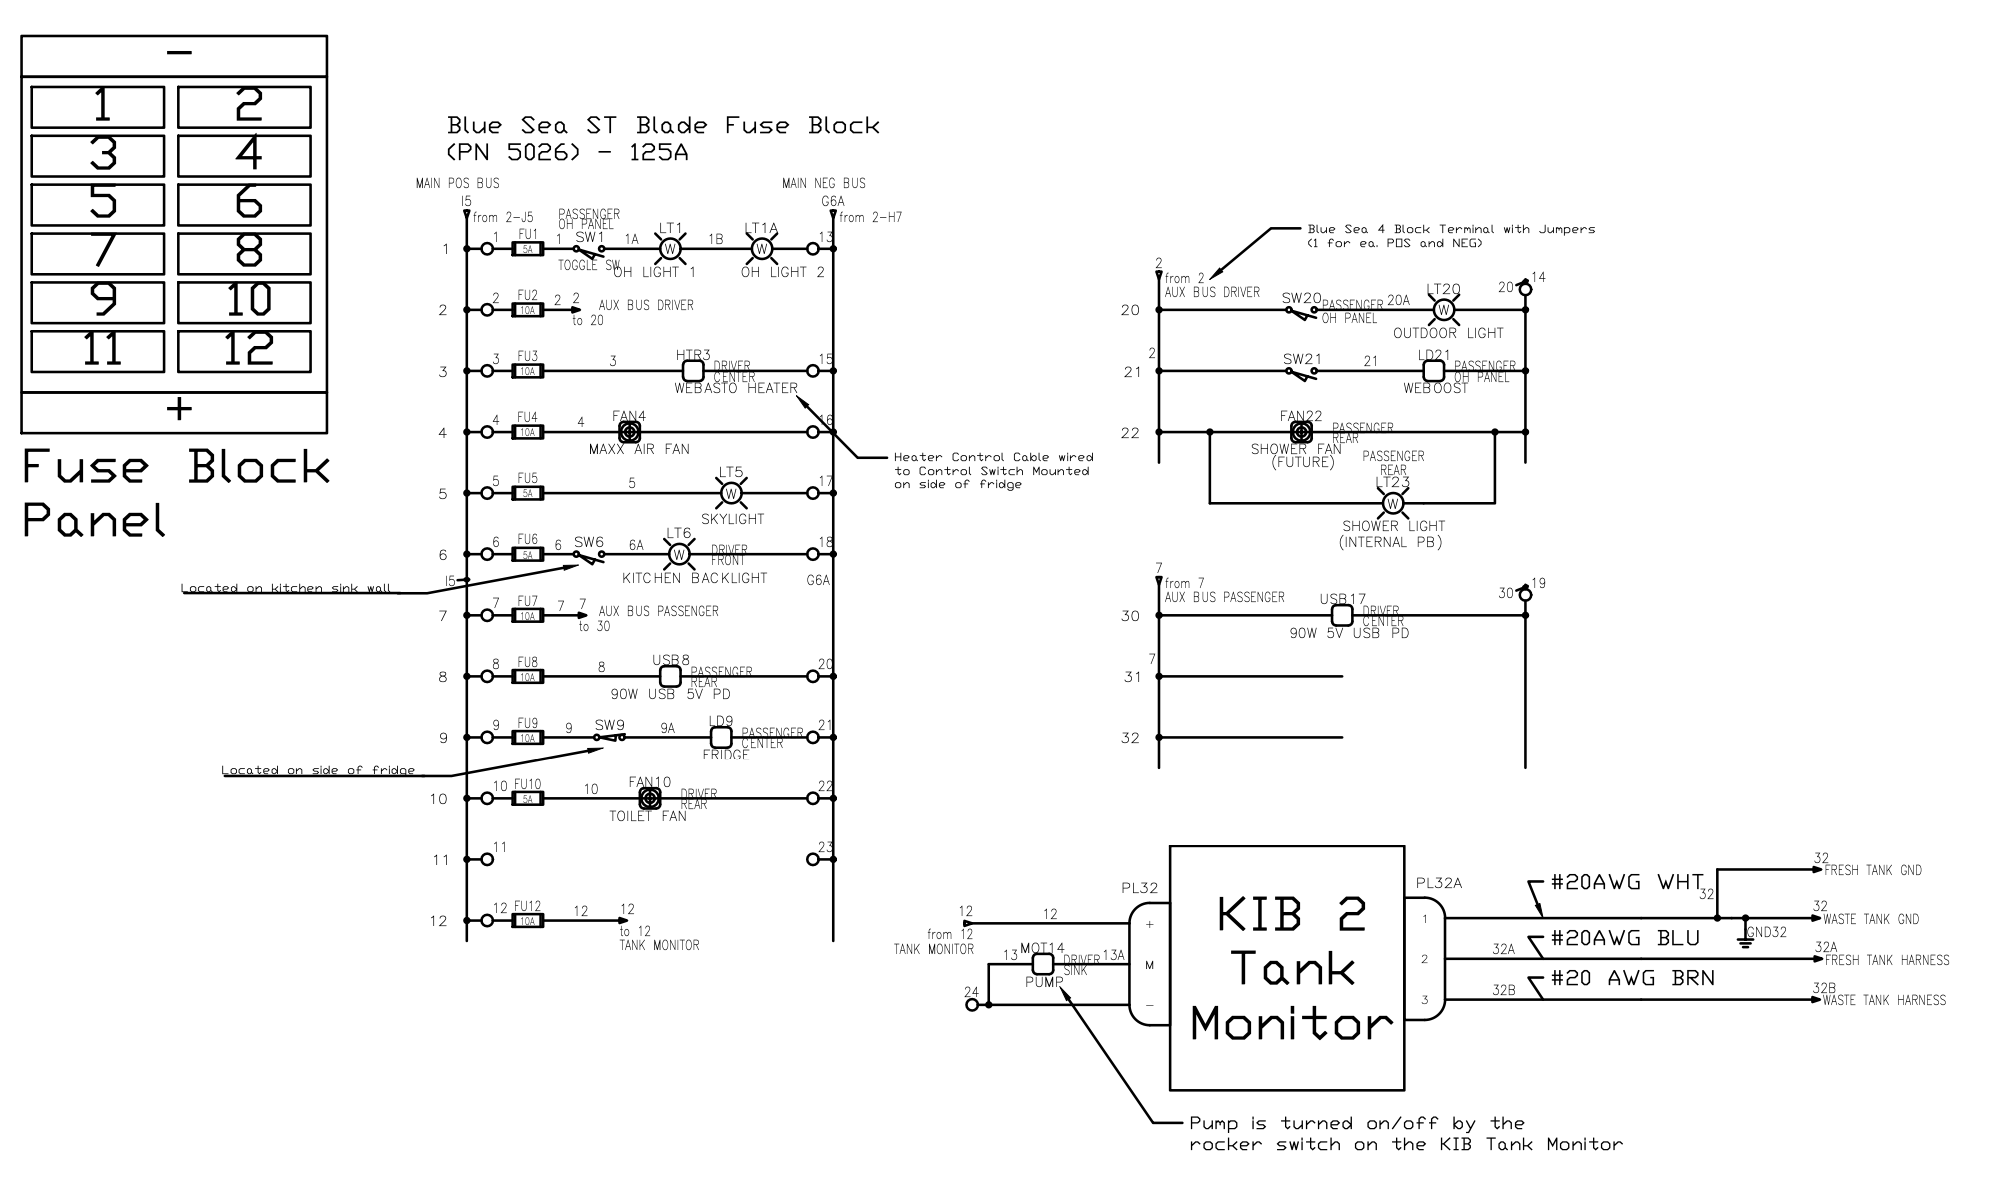
Below is the 12V distribution fuse block which shows the connected loads. Also see DWG-03-12V-SYSTEM for the high-res pdf version.
Pro Tip: Add a 12V bus bar in places like the back of the van or the other side, so you can add more small appliances later (like LEDs, toilet fans, etc) without having to re-route across the whole van.
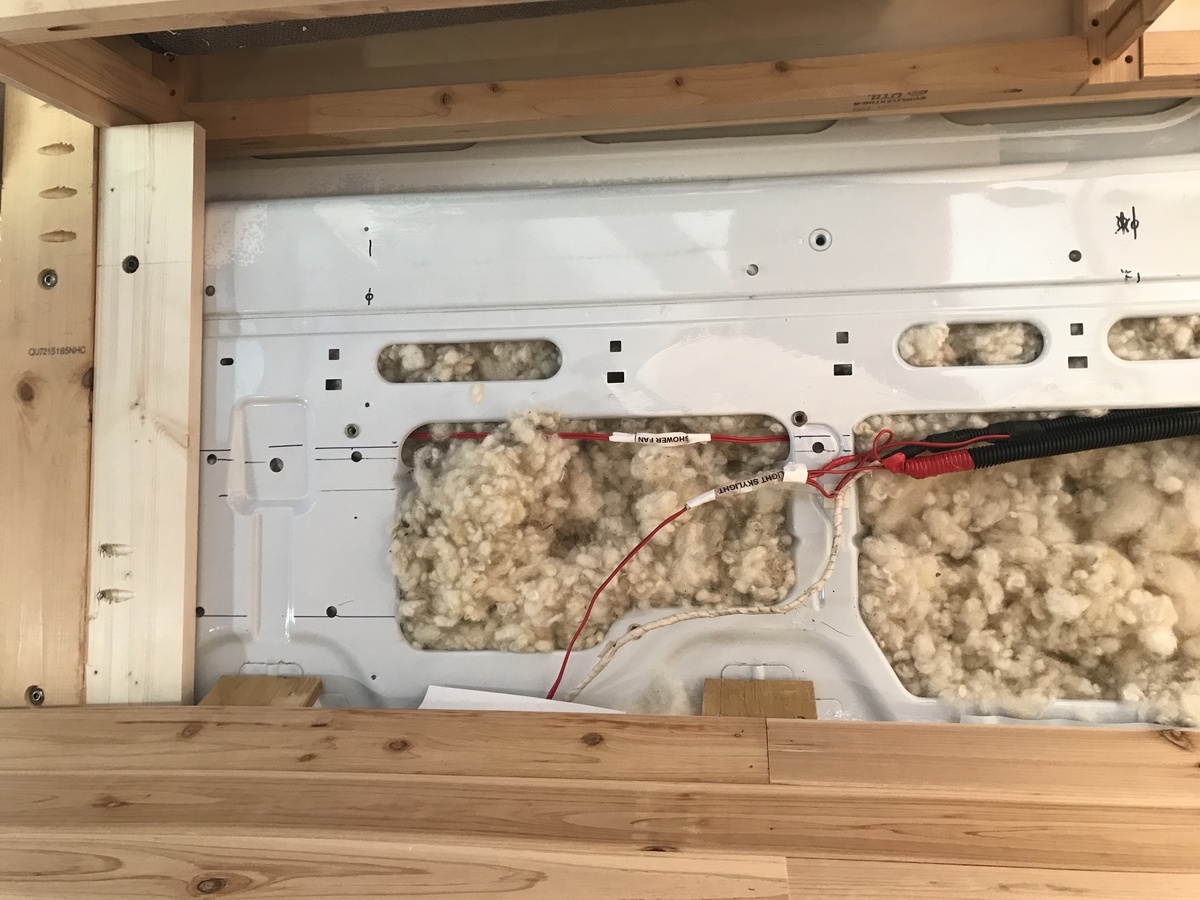
From this there are two more “distribution” buses - one is in the recessed cabinet going into a (4) position bus bar (1 inlet, 3 outlet). This feeds the external light, the shower light, and the rear 12V USB charger near the shower. The OH lights and the skylight are NOT off of this bus bar- as you can see from the above picture they come directly from the main 12V distribution panel.
The other 12V secondary bus is on the passenger side near the water heater. This powers the USB C charger on the driver side near the sink. This was added so you could add another USB charger for camera equipment.
The negative bus bar is grounded to the chassis. The ground is located behind the fridge/pantry area (inaccessible, after the fridge was installed).
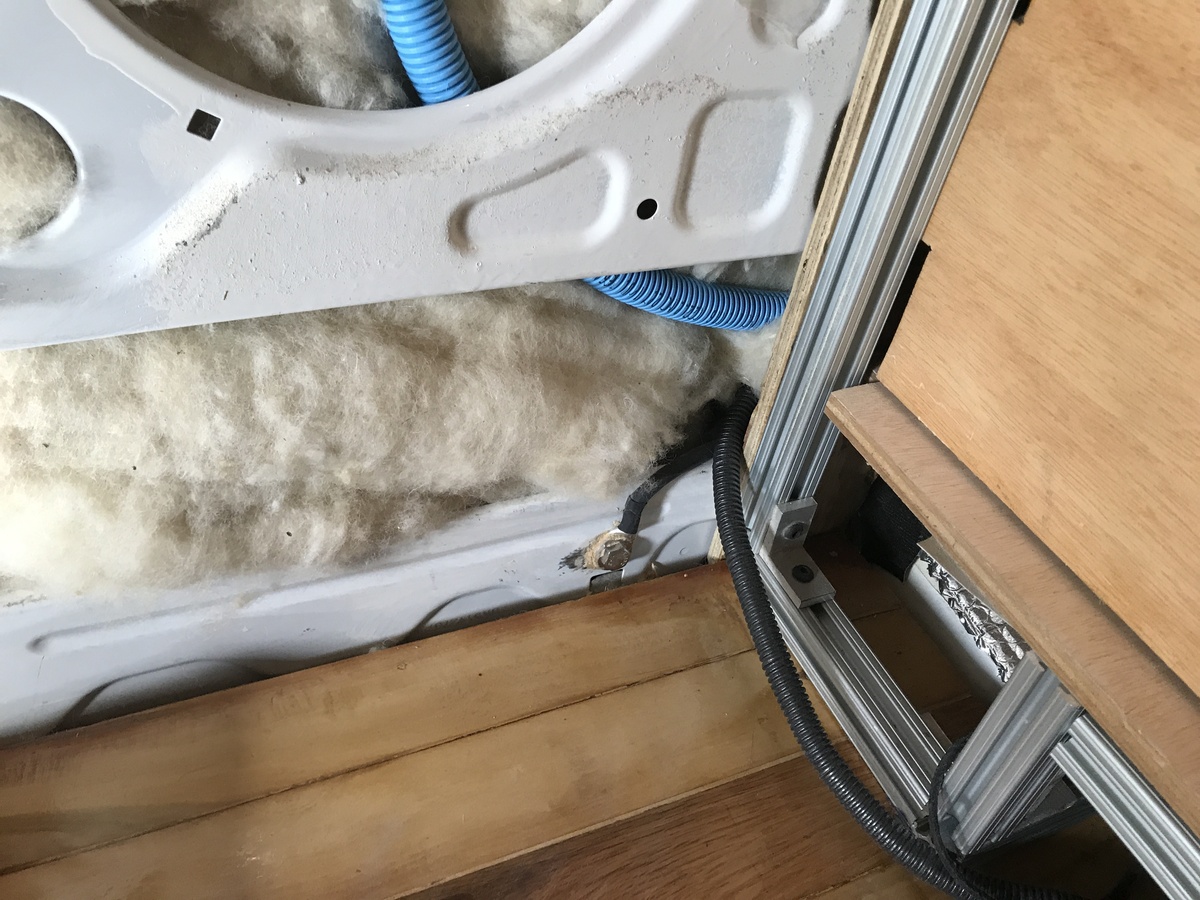
Routing the conduit through the side walls:
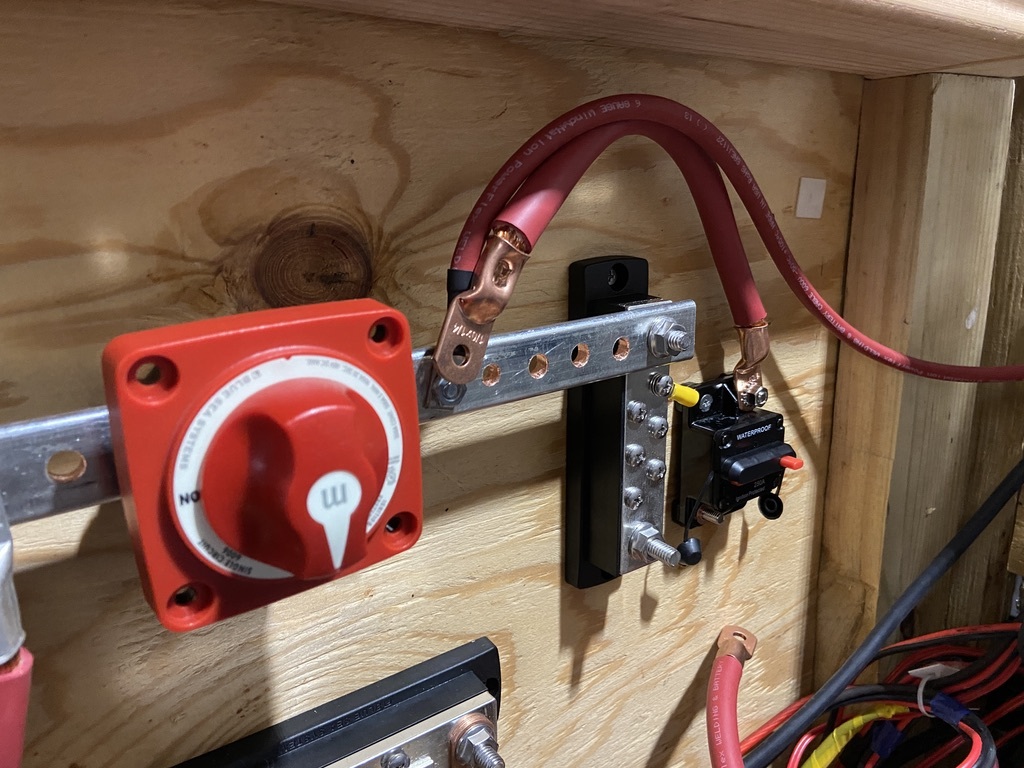
Custom bus bar made from copper.

CAD Drawings
Full-size PDF CAD diagrams of the system can be found below:
- DWG-01-AC-SYSTEM(shows the inverter/charger and the shore power hookup)
- DWG-02-BATTERY-COMPARTMENT (shows the connections in the main electrical battery compartment and also the solar and alternator charger systems)
- DWG-03-12V-SYSTEM (shows the 12V distribution fuse block, branch circuits, and loads)
Next: 07-Plumbing-Water-Heater